How can I analyze sent emails to improve deliverability?
Vault CRM provides several tools to help you track sent emails and resolve failed email deliveries to maintain your email reputation and deliverability. Use the Email tab on iPad or web browser to view all sent emails and in the event of a failed email delivery, understand why.
Understanding the Different Sent Email Statuses
When monitoring Approved Email activity, you’ll need to understand what the various statuses indicate to monitor email performance and troubleshoot any delivery issues:
-
Saved - Email has not been sent
-
Sent - Email engine successfully sent the email but has yet to receive delivery confirmation
-
Scheduled - Email is scheduled
-
Delivered - Email accepted for delivery by the recipient’s email server
-
Bounced - Email rejected for delivery, for example, because of non-existent address or full inbox
-
Dropped - Email was sent to the same non-existent address where the prior email bounced
-
Failed - Vault CRM did not successfully send the email
-
Unsubscribed - Email was delivered successfully, and the recipient unsubscribed via the link in the email
-
Marked as Spam - Email was delivered successfully, and the recipient marked the email as spam

|
Failed emails typically fail if content expires or consent is invalid by the email’s send time. This often impacts scheduled emails as recipient consent is re-verified before delivery to honor any opt-out requests made after the email’s scheduling. |
Resolving email delivery errors
To improve deliverability and email reputation, users should regularly resolve any email error issues as soon as they are available. Identifying and resolving bounced, dropped, or failed messages is essential to deliverability.
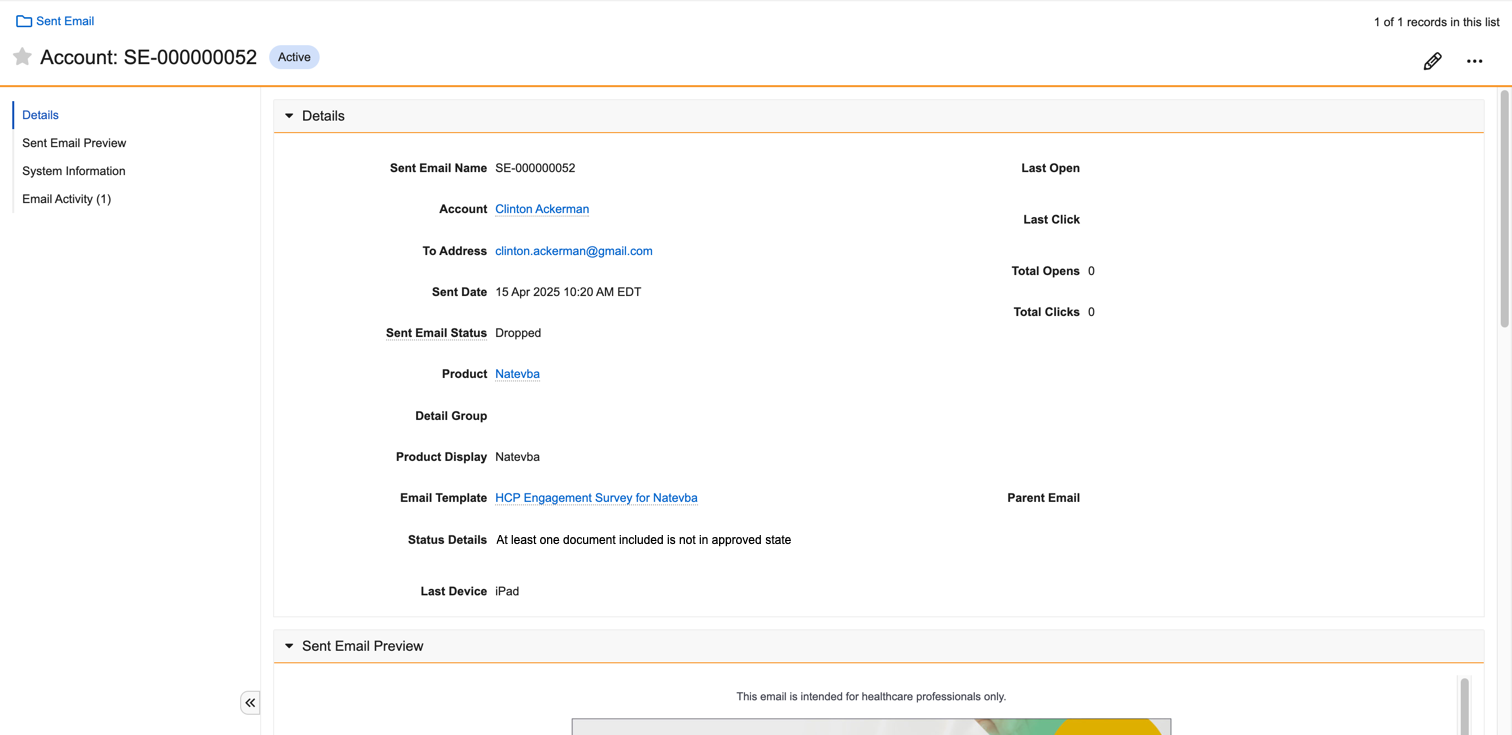
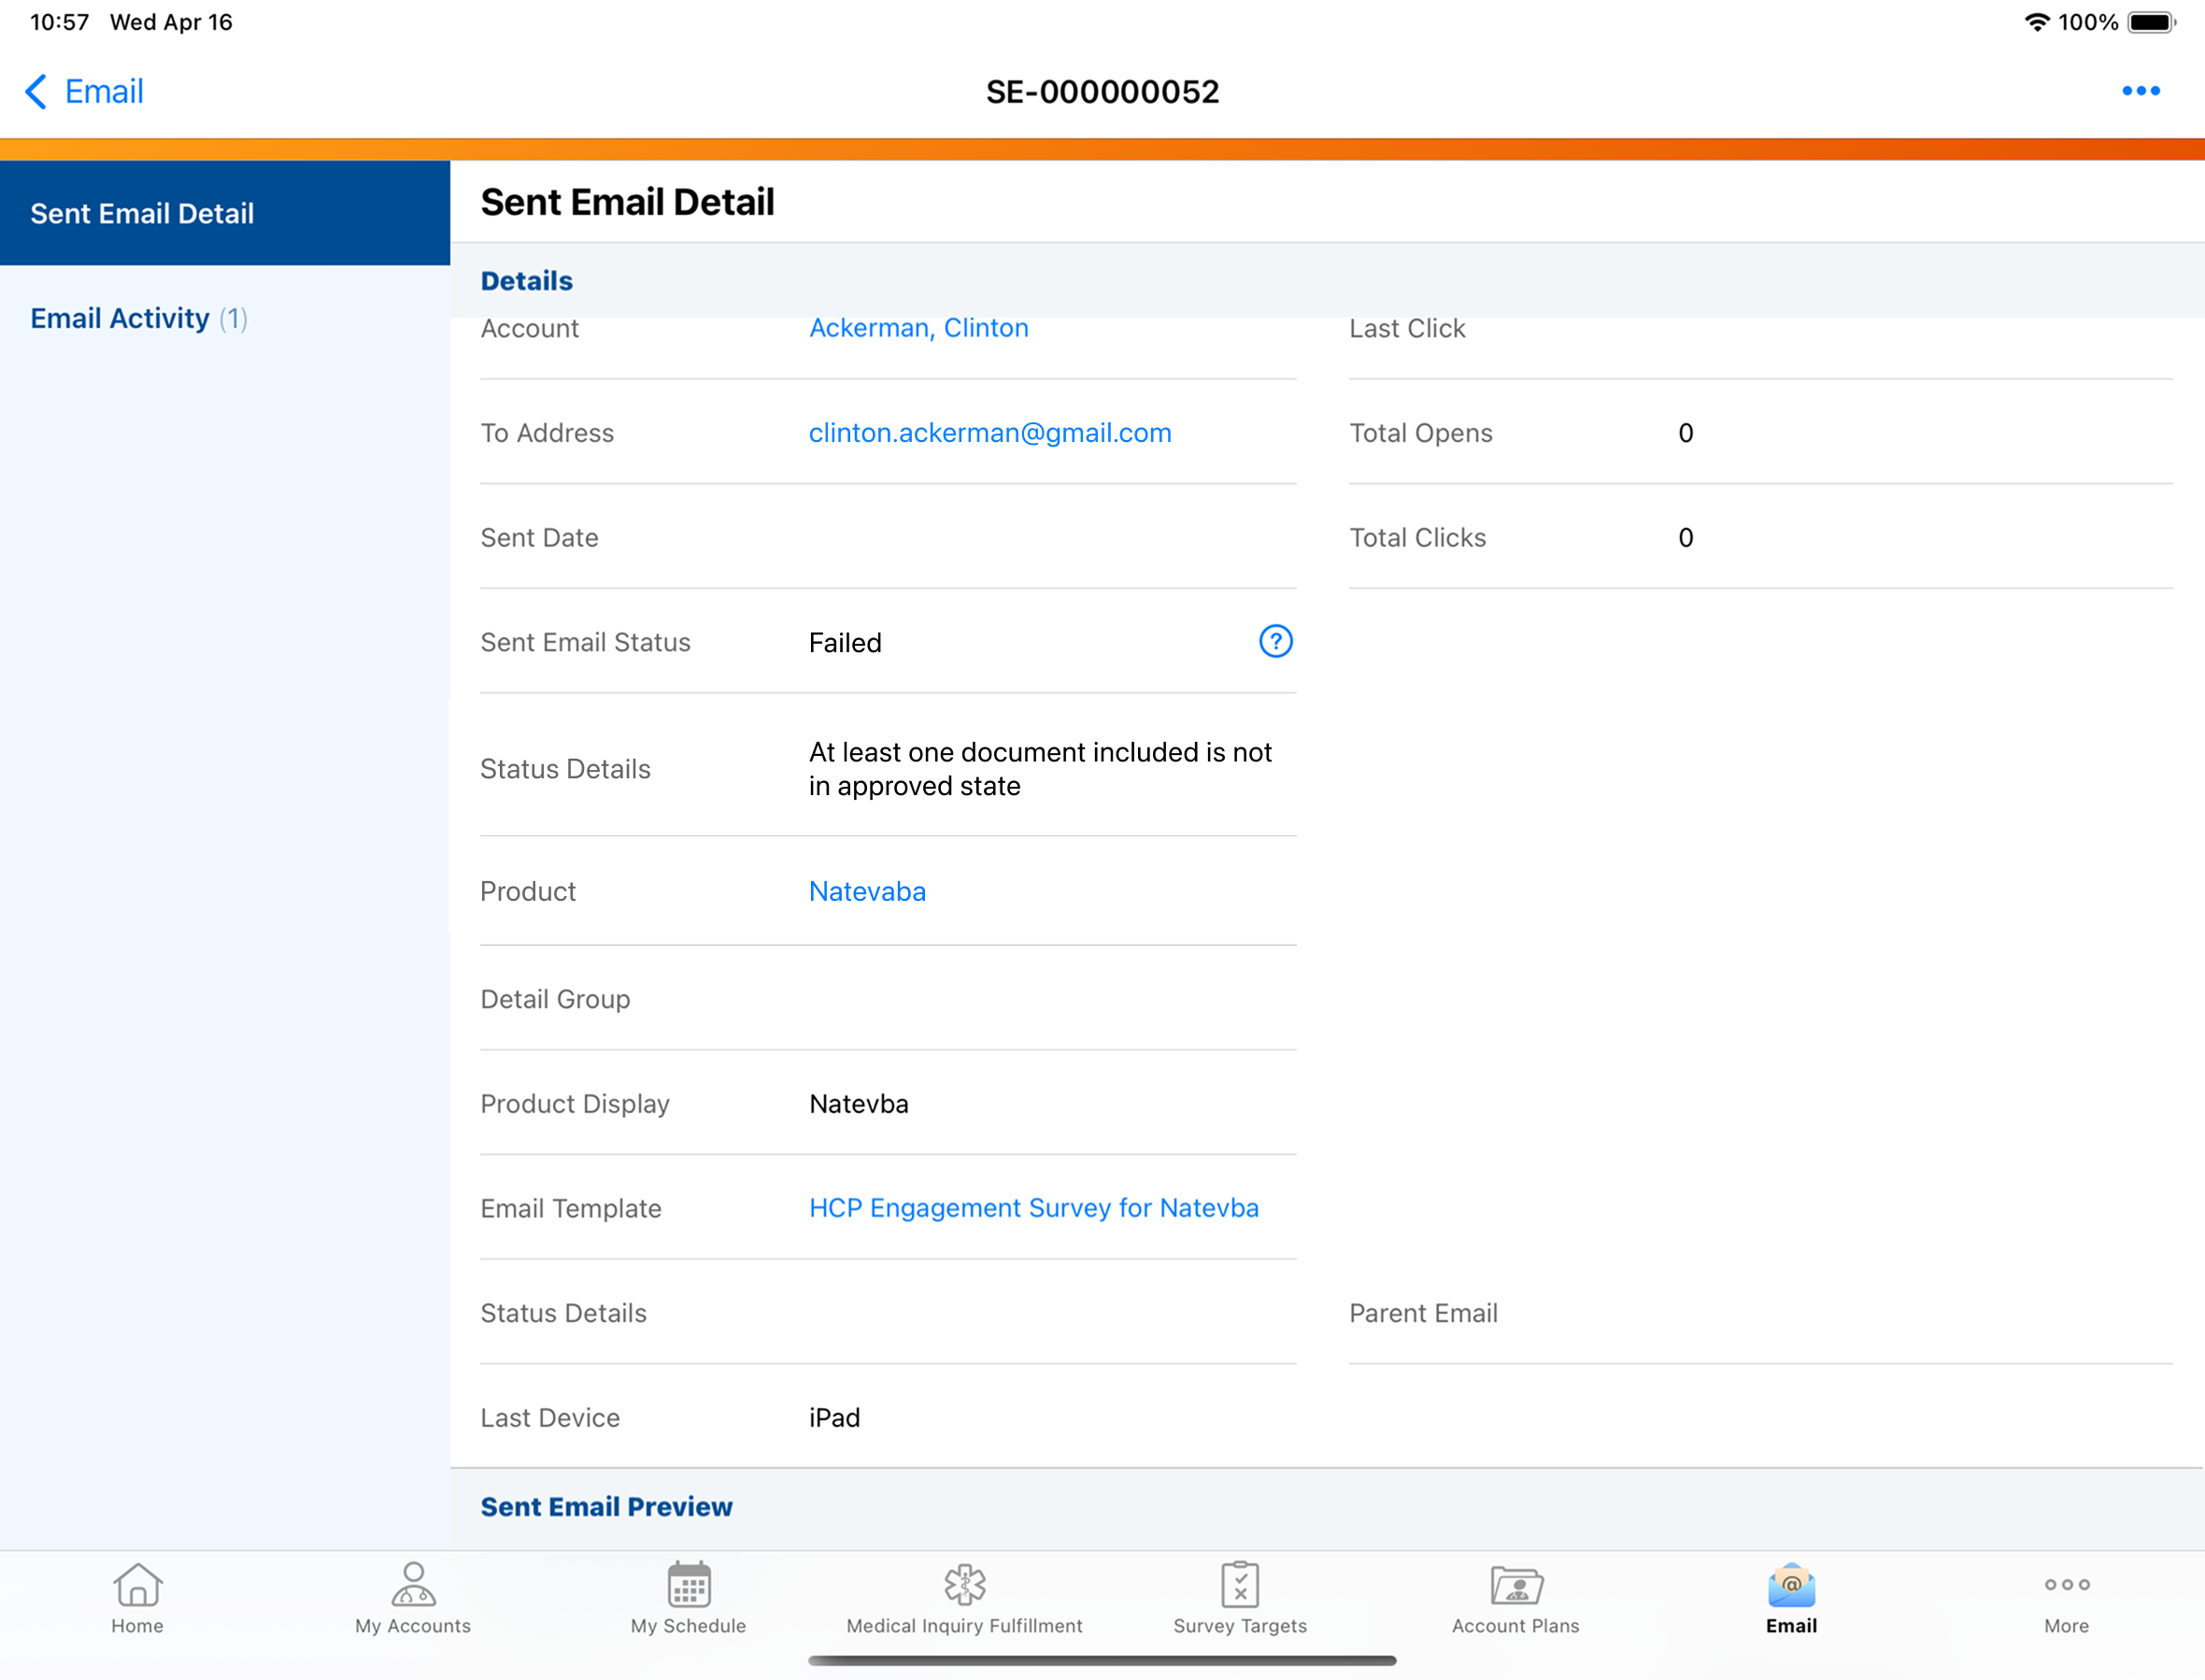
If an email failed to deliver, view the email’s Status Details to identify the reason. Undelivered emails include an error message to aid users in resolving the error and thereby increasing the deliverability in the future.
To view sent emails and email statuses via iPad:
-
Navigate to the Email tab.
-
Select the Sent tab.

-
Select the email’s More Options icon in the email preview.
-
Select View Details.
-
Use the Status Details field to identify the reason for the failed delivery.
-
The Status Details field only displays in the event of a failed delivery
To view sent emails and email statuses via web browser:
-
-
Navigate to the My Accounts tab.
-
Select the appropriate account.
-
Select Sent Emails in the left-hand table of contents.
-
Select a sent email.