How do I use the Case Console to manage every detail in one view?
The Case Console is Sarah’s primary workspace, featuring a three-panel layout that keeps critical account data visible on the left while providing specific work tabs in the center.
Let's first look at the Case Console’s components, then follow Sarah as she manages the damaged samples incident for Dr. Beacher.
The Case Console: A Single View
When Sarah opens Dr. Beacher’s case and begins to work, she doesn't need to jump between browser tabs; everything she needs is presented in a three-panel layout:
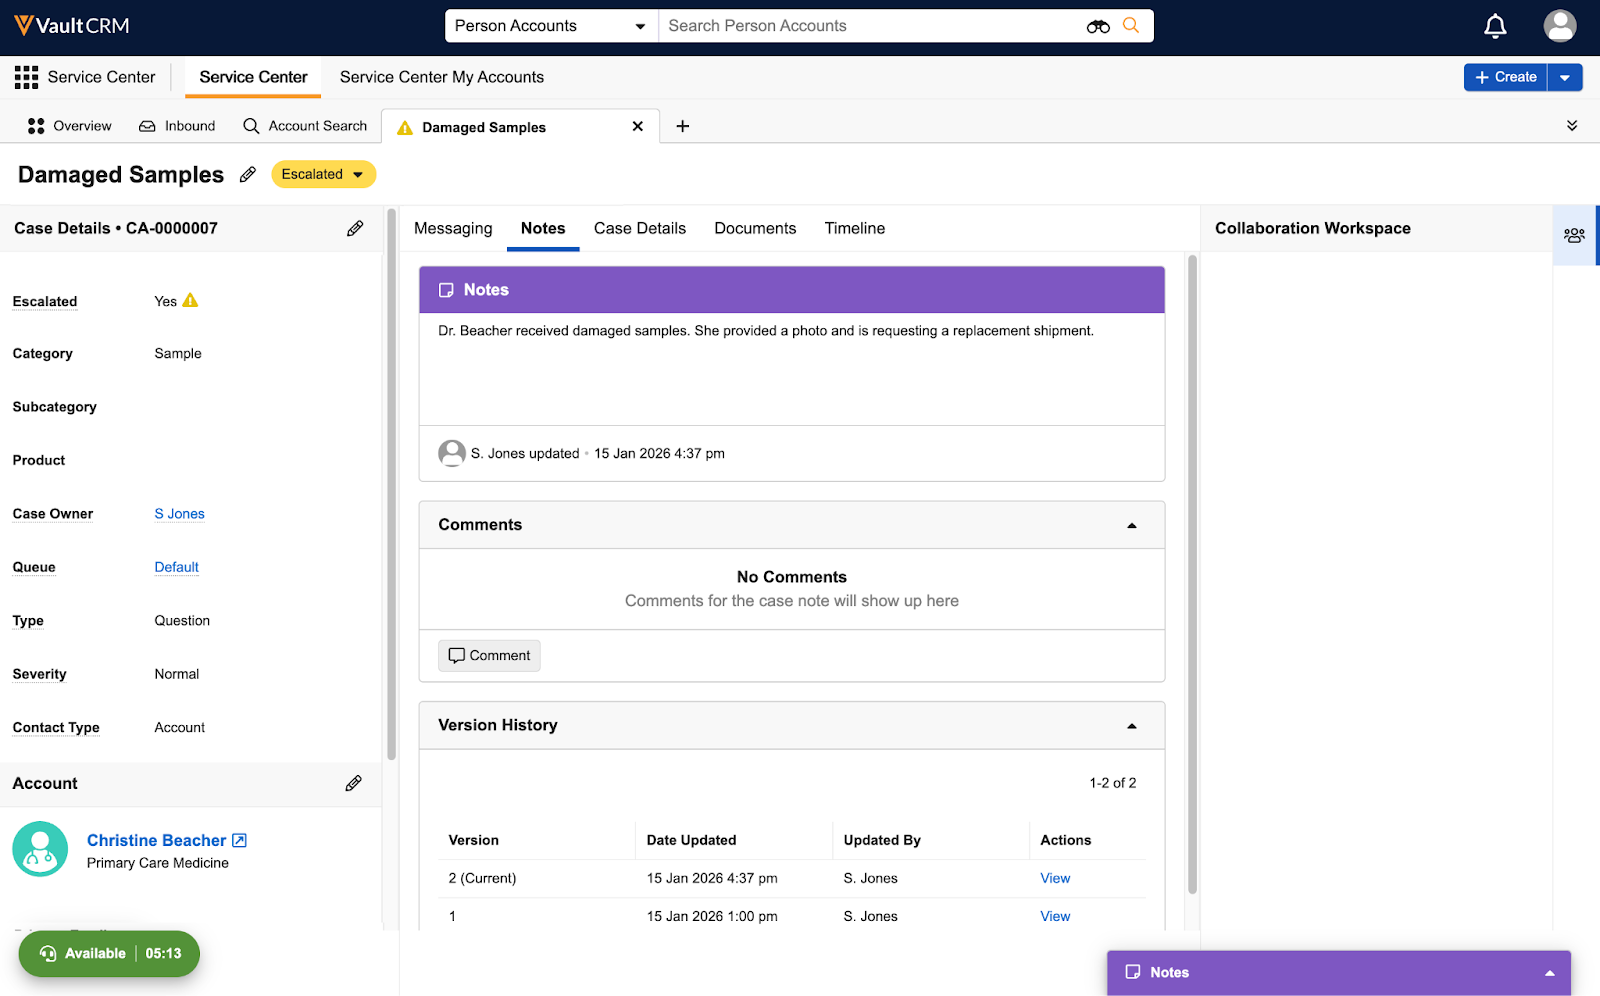
- Left Panel - This section displays critical fields at a glance, including Severity, Queue, Owner, and Case Details. Sarah can edit these fields directly, though Service Center prevents simultaneous editing of the left and center panels to avoid data conflicts.
- Center Panel - This is the main workspace containing tabs for specific tasks:
- Messaging - View threaded emails and reply to customers
- Notes - See versioned comments and internal context
- Case Details - Access the full data set of the record
- Documents - Upload and classify relevant files
- Timeline - View an automated log of all changes to the case, plus Talk Time metrics for phone calls placed or received in Service Center
- Right Panel - This panel provides access to communication tools. If Sarah’s Vault is connected to Microsoft Teams, relevant Teams channels display here.
Next, follow along as Sarah takes the new case through its lifecycle, from creation to completion.